SPWrapper Plugin for Netbeans
This page provides a step by step tutorial on how to create your first project with SPWrapper and Netbeans.
This tutorial has been written at the beginning of the project, therefore it always refers to Oracle. Now (version 0.8) SPWrapper has been modified and starts supporting other databases. To try it just use your jdbc driver instead of the Oracle one.
This tutorial has been updated to decribe the steps needed to work with Netbeans 6.0, if you still need to work with Netbeans 5.5 please refer to the tutorial of Spwrapper for Netbeans 5.5
Important note for Netbeans 6
One of the plugin Spwrapper depends on has changend name, this makes impossible to install the release 2.0 beta with Netbeans 6 rc2 and the offical release 6. Make sure to download the new release 2.0.2
Installing the software
First of all you need to install Netbeans version 6.0 and Java version 1.6. You can download them together at Netbeans home site.
Then download SPWrapper plugin from sourceforge project page. The binary distribution contains spwrapper.jar and two netbeans modules, extract them from the archive.
Run Netbeans and from the main menu choose Tools -> Plugins, then click the Downloaded tab and on the Add Plugins... button. You will see the following dialog box
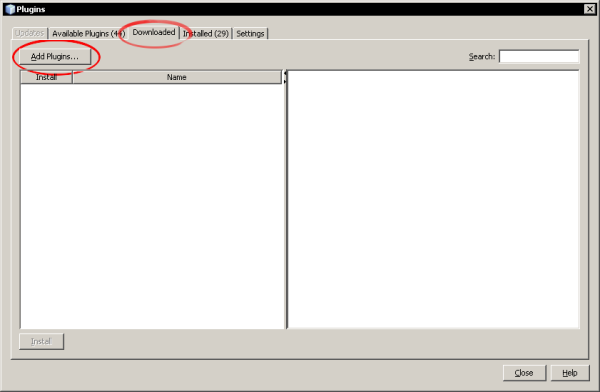
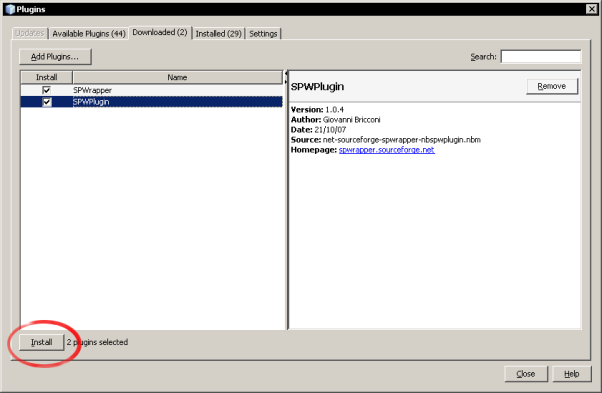
Choose both the nbm files extracted from the distribution zip file. After this step you are ready to click the Install button
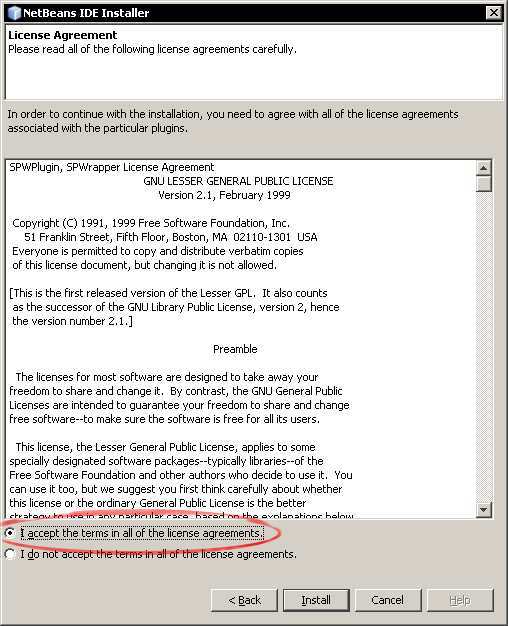
Then license agreement dialog box appears, chose I accept the terms in all of the license agreements.
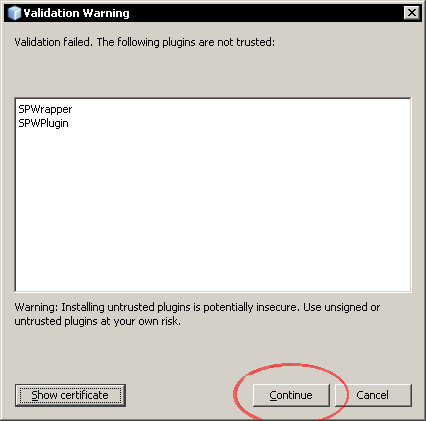
Now the Validation Warning could appear, sorry I need to update my certificate...
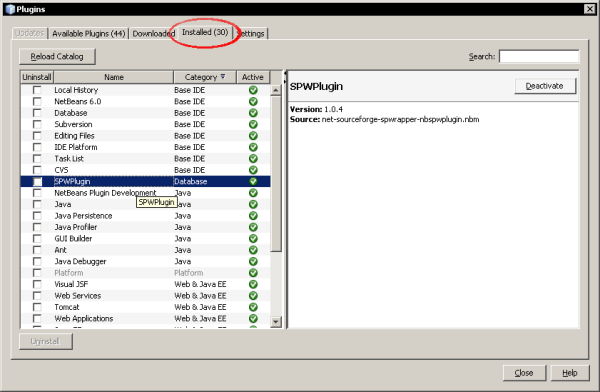
Now clicking on the Installed tab you should see the plug-in installed!
Setting up the database connection
Close the plugin manager and open the Services palette selecting from the main menu Windows -> Services. Expand the Databases tree, and right click on the Drivers node. Choose New Driver...
Fill in the dialog box as described in this image. You will find the jdbc Oracle driver in your database installation under the jdbc\lib directory. You can also download the driver from the oracle site.

Expand Drivers and right click on Oracle, choose Connect Using...
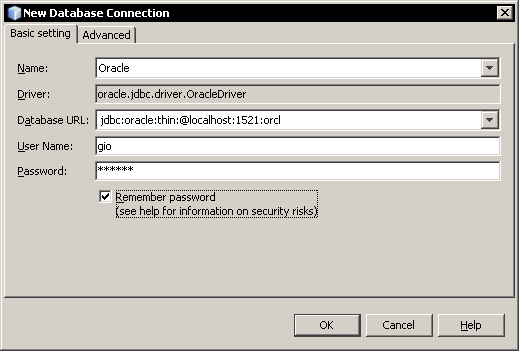
The above picture is an example of how you should fill in the form, you need an username, a password, the SID host and port of the database. If everything is correct in the Services palette the new connection will appear. Expand it, you should see your stored procedures, and tables.
WARNING If you try to use OCI connections you will get errors later. During the creation wizard it will be displayed a message which says that this kind of connection is not supported. Actually this happens because this exception is thrown "java.lang.UnsatisfiedLinkError: Native Library ...\ocijdbc10.dll already loaded in another classloader". This is probably due to how the new Netbeans version manages the class loading. Use a thin connection instead.

Remember that you can use SPWrapper and SqlJaTor also with Postgresql, MySql and SqlServer 2005
Setting up a new project
Now that database connection is checked it is possible to start working with a Java project. From the main menu chose File -> New Project and chose a new Java Application. Fill in the forms as in the following pictures:
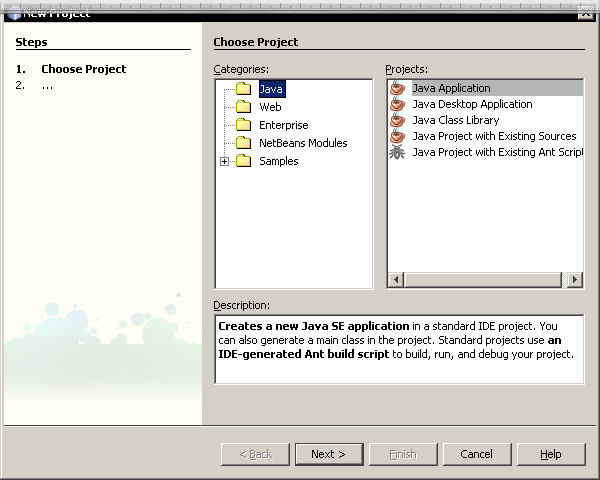
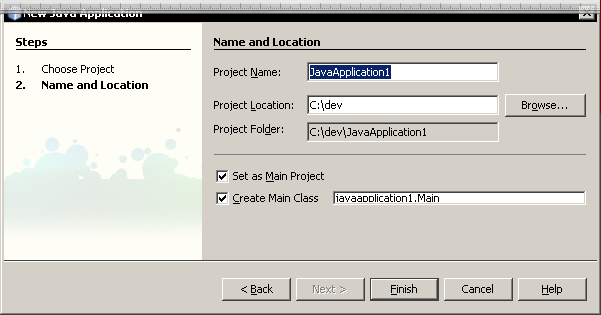
A new project appears in Netbeans' project palette.
Before start working on stored procedures we need to add the required jar libraries to the project. Switch to the Files palette and create a new folder under your project (right click on the project and chose new folder)
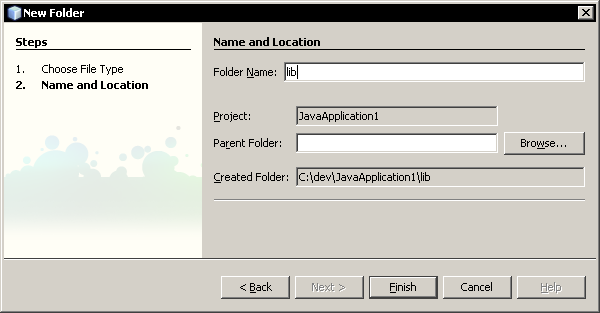
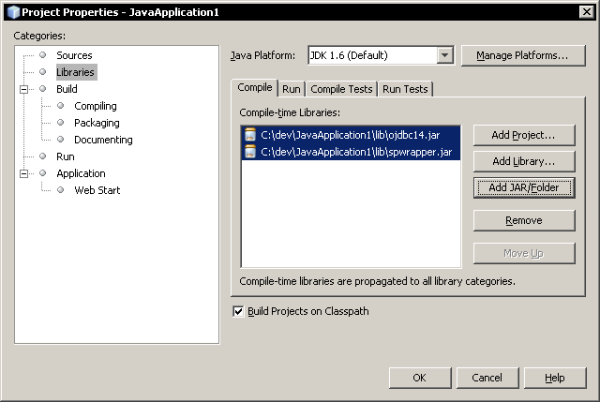
Copy to the newly created folder the jdbc driver ojdbc14.jar and spwrapper's jar spwrapper.jar. Then switch back to Projects palette, right click on your project and chose Properties. Fill in the form as the picture shows.
We will now create a simple stored procedure that sums two numbers and then we will create and use the wrapper.
Setting up a web project
If you are working on a web project with Tomcat you should avoid placing the JDBC driver both in the project and in Tomcat's libraries. This will cause problems due to having different class loaders loading the same classes from different jars. Tomcat JDBC connection pools are initializated using the classes coming from its library folder, while SqlJaTor classes would reference those located inside the WEB-INF/lib directory.
This is the correct procedure to use for a Web project:
In the services tab open the properties menu for Tomcat
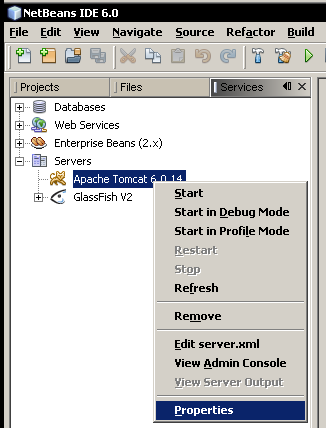
Look at the higlighted path and copy your jdbc driver inside that path/lib. For instance place postgresql-8.2-504.jar inside c:\programmi\apache software foundation\apache tomcat 6.0.14\lib. This is not strictly needed since netbeans should do it on his own when you define the data source in the context.xml
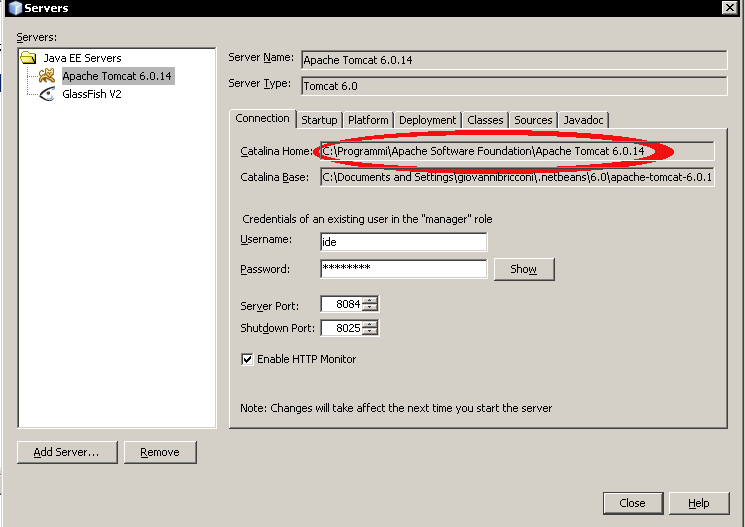
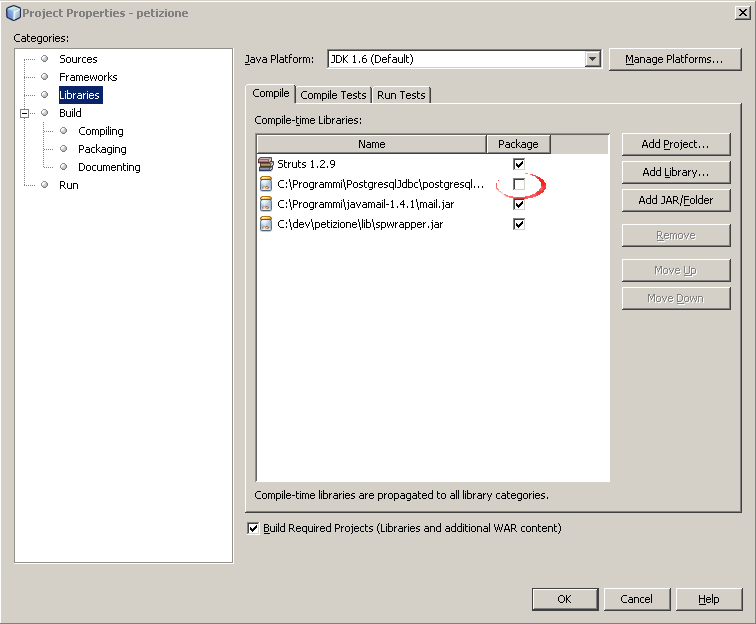
Remember to restart the server if needed. Now you can create a new web project from the File -> New Project menu. After creating it open its properties from the projects tab and chose the libraries options.
As you can see in this project I am using postgresql, mail and spwrapper jars and struts. Notice that I have unchecked the package flag for postgresql, this because I do not want to have it copied inside the WEB-INF/lib. Referencing in this way the driver allows to compile the wrappers which allways references driver specific classes without having classloader problems
Creating the wrapper
To add the following stored procedure to your database, switch to the Services palette, right click your database connection and choose Execute Command.... Then copy and paste the code and press the Execute button (Ctrl+Shift+E). Note: unfortunately with my netbeans beta edition this does not work, but it worked with the previous netbeans release. Use Pl/sql Developer or similar tools to create the procedure. It seems that Netbeans executes a sql string from "create" to the first colon ";".
create or replace function sum_arguments(a in integer,
					b in integer) return integer is
  Result integer;
begin
  Result:=a+b;
  return(Result);
end sum_arguments;
If you browse you procedures you will see "SUM_ARGUMENTS" appearing (perhaps you need to refresh the view).
Go back to the Projects palette, right click on a package in your project and chose New File/Folder... then chose Stored Procedure Wrapper in the Java Classes category.
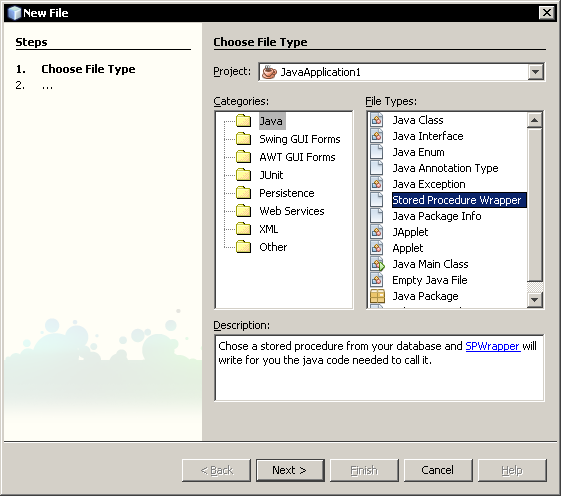
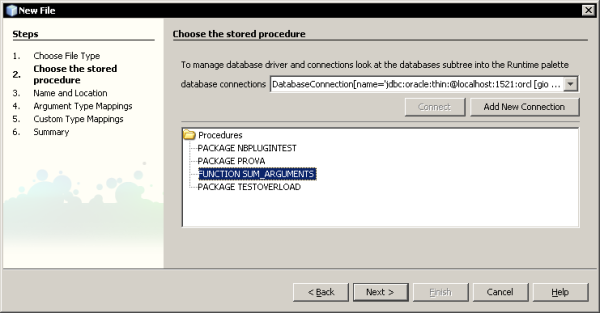
Then chose the just created stored procedure and click next
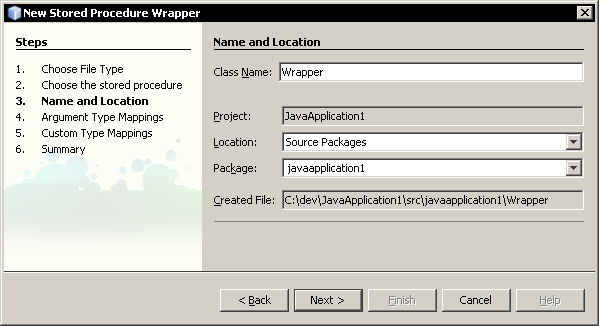
Fill in the required java class name field, then press next.
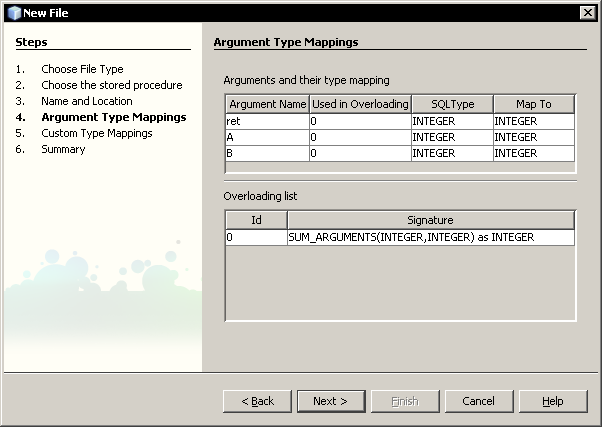
SPWrapper has detected the procedure parameters. If you are not satisfied with guessed types you can change them; pressing the help button shows an explanation on how to do this. You can read on supported datatypes in spwrapper documentation
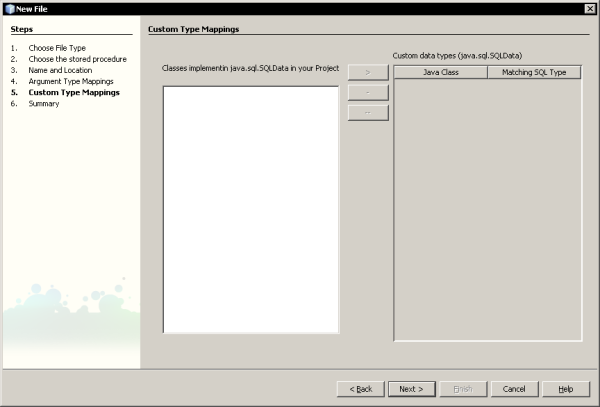
If you need to map special SQL datatypes using java.sql.SQLData interface you should fill this new form. A little change has been introduced since the previous release: now you don't have start typing the class name to look for it, all the suitable SQLData classes are presented to you.
We do not need this feature for this tutorial, so leave the form blank and press next.
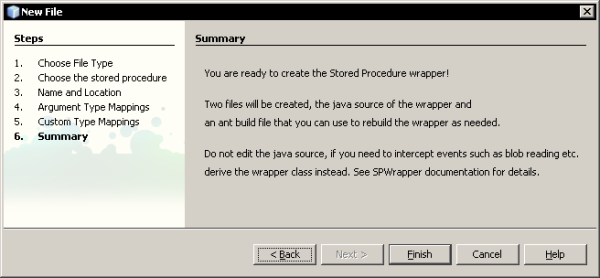
A simple message tells you that some files will be added to your project
Working with the sources
Three files will appear when you click the finish button: Wrapper.java, Wrapper.spw and buid-impl-spw. As you can immagine Wrapper.java is the java source code that allows you to call the stored procedure.
Wrapper.spw and buid-impl-spw are two ant build script. The former stores the input you provided whithin the wizard, and running it you are able to rebuild the java wrapper. The latter is a master ant script able to rebuild all the wrappers found in the project. Further explanation will be provided at the end of this tutorial.
Open the Wrapper.java file: if you see import error in it you forgot to add the required libraries to the project. Do it and recreate the wrapper.
Build the project (F11), there should be no errors.
Using the wrapper
Now the wrapper is ready to be used. Replace the Main.java source code with the following. Make sure to change username, password and connection string.
Run Main.java, you should see the message "5+3=8" appearing in the output window.
package spwrappertest;

import java.sql.*;
import java.util.Properties;

public class Main {

    /** Creates a new instance of Main */
    public Main() {
    }

    /**
     * @param args the command line arguments
     */
    public static void main(String[] args) throws Exception {
        Properties params = new Properties();
        params.setProperty("user","gio");
        params.setProperty("password","facile");
        Wrapper w = new Wrapper("jdbc:oracle:thin:@localhost:1521:orcl",params);
        System.out.print("5+3=");
        System.out.println(w.SUM_ARGUMENTS(5,3));
    }

}
Working with SQL Statements
With this release (2.0) a new wizard has been introduced to work with SqlJaTor. It is veriy similar to the one described above.
Open the Services palette, right click on your favorite connection and click Execute Command to open the SQL editor. This time I have coosen a MySql 5 connection.

Notice the SQL->Java button!
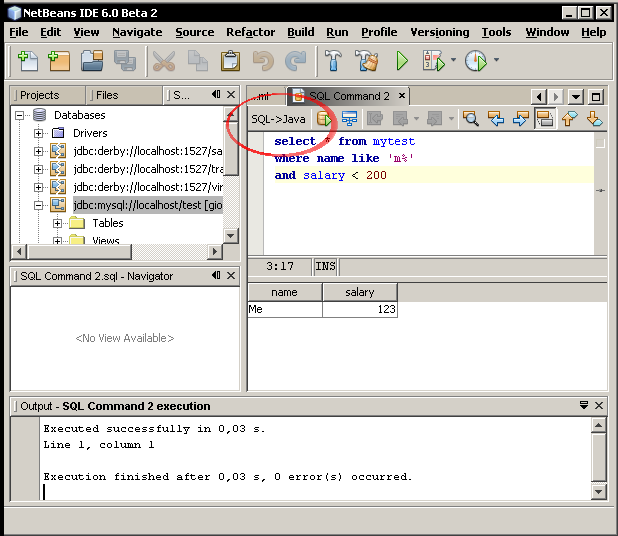
Type a sql statement in the editor, and test it pressing Ctrl+Shift+E, once satisfied you are ready to start with SqlJaTor wizard pressing the SQL->Java button. First I wrote and executed this script:
create table mytest
(
    name varchar(80) not null primary key,
    salary int
);

insert into mytest(name, salary) values ('Me',123);
insert into mytest(name, salary) values ('You',456);
insert into mytest(name, salary) values ('The Boss',789);
Then I cleaned everything and inserted a select. I cleared everything because just typing the full script, selecting a piece of text and pressing the Run SQL button does not work as expected, perhaps some netbeans gui will fix this :).
This is a simple query:
select * from mytest
where name like 'm%'
and salary < 200
Just type it, check it and the press the sql->java button, you will see a familiar dialog box, chose a class name and a package
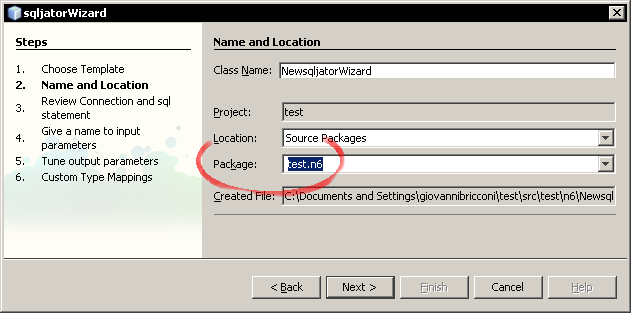
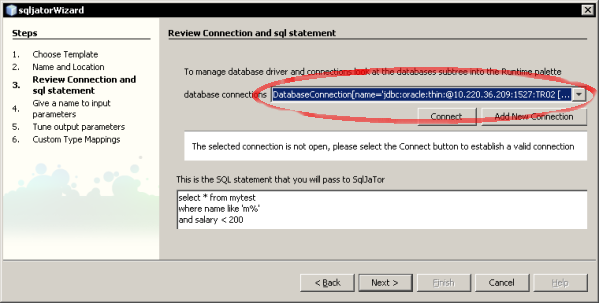
Press Next and you will see the Review connection and sql statement pane. Just chose the right connection and if needed change the Sql statement. You could have to change the database connection selected because there is no way to programmatically pick the right one already selected in the editor, so if you have many connections you could have to pick the right one.
SqlJaTor automatically detects input parameters, from your sql statement. By the way sometimes you would like not to translate all the constants of the statement into input parameter. For instance suppose you would like to trim the output of a column in a select, you could use a "select substr(name,1,10)...". To avoid turning 1 and 10 into input parameters you could use the <const% construct as explained into SqlJaTor documentation. This is the reason behing placing this text box in this wizard step.
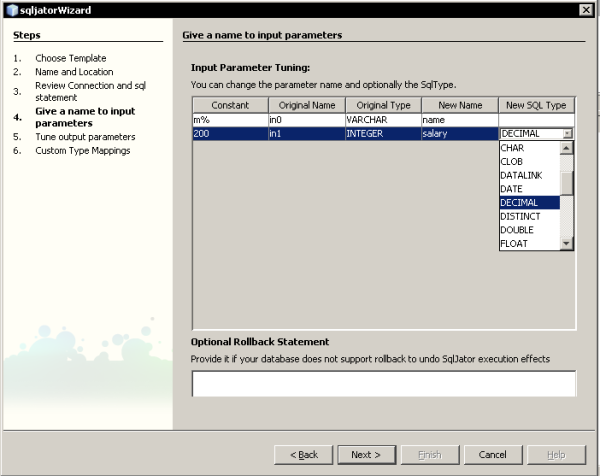
In the next pane you can review the detected input parameters, give them a name and change their types. I used the names "salary" and "name" and changed salary to decimal. You can also provide a "rollback" statement: do it if your database does not support the rollback instruction to undo all the work done by sqljator to detect the output parameters. In this case I have left blank this field
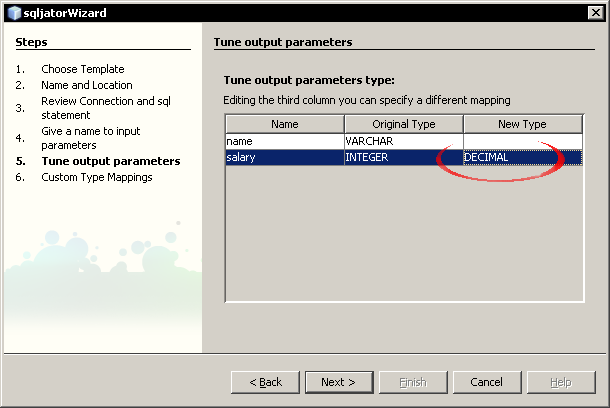
Now review the output parameters detected. Notice that their names are the same of the selected colums and that are also the same of the input parameters. Also there I have switched the salary type to decimal
At the end of the procedure you can choose custom data types, if you need SQLData objects. Usually just click next. In the following picture you can see some Data Object I actually have in my project for test purposes.
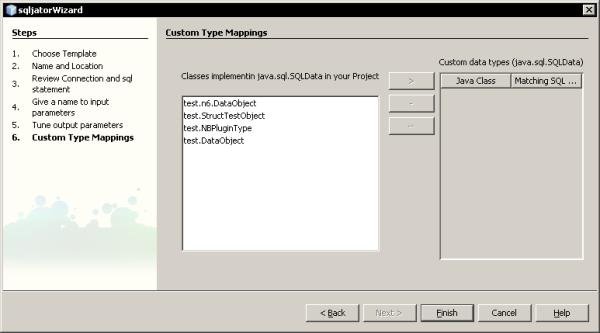
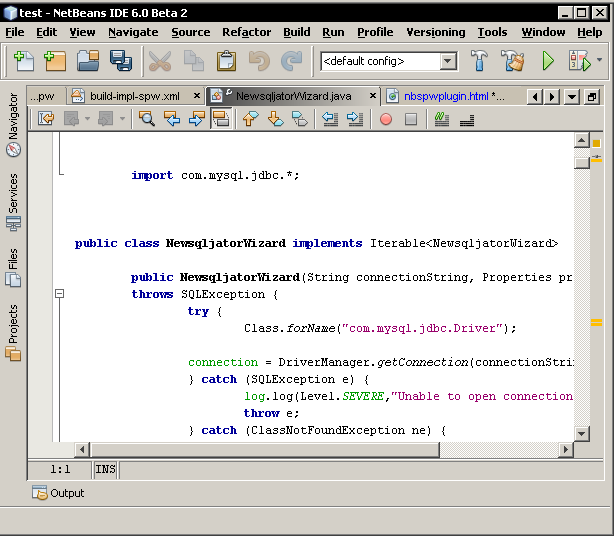
Congratulation, two files will be created in your project: the java source and an spw ant build file that you can later change and use to rebuild the java wrapper. Notice the member variables declared in the java source and their type.
Ant makefiles and wrapper rebuild process
As seen before two Ant file where produced.
Open Wrapper.sqw and read it; as you can see the the library paths are relative to the project directory, so it is easy to put these files in CVS and share them with other developers.
If you need you can edit directly spw files, so you can change previous choices without running again the creation wizard.
The build-imp-spw.xml file is located in the nbproject folder, you can edit it if you want to customize stored procedure rebuild process.
For your convenience a main menu action Build -> Rebuild Stored Procs as been added. Selecting it actually runs build-imp-spw.xml that in turn rebuild all wrappers in your project.
That's all!
Please provide me a feedback writing to bricconi <at> netscape.net